This one is a very unique gift for your soon to be mom who is also going to be breastfeeding. It takes a practical item (reusable breast pads by Bamboobies) and makes it a centerpiece worthy gift!
You can use any number of breast pads, I used half a dozen. I did this post in a bit of a hurry and forgot to take a wide shot of supplies, sorry! No time for a video for this one either.
Supplies:
- Bamboobies Heart Shapes Breast Pads in Hot Pink or Light Pink
- Floral Stem Wire
- Green Satin Ribbon (wide, or wide and slim in same color)
- Glue Gun and Glue Sticks
- Lighter
- Scissors
- Bud Vase
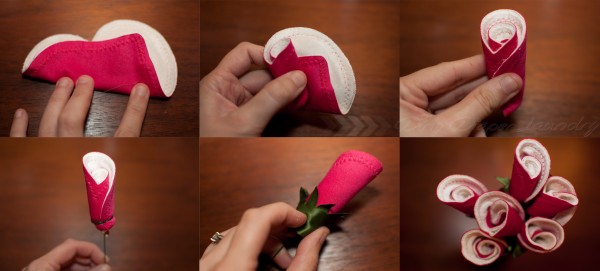
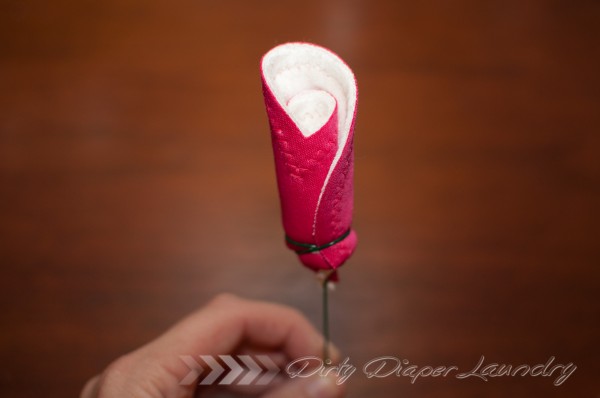
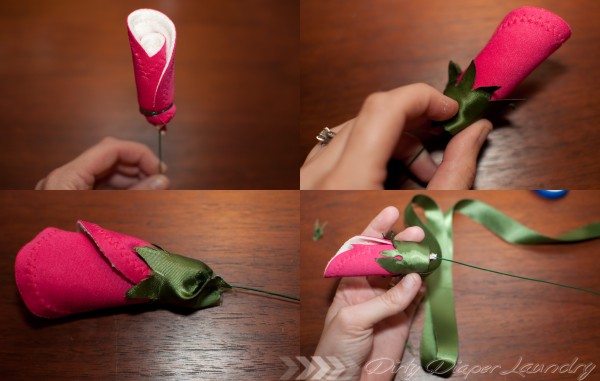
Before you begin making your rose bud make sure you have a piece of stem wire handy. Using the heart shaped breast pad, fold the bottom of the heart inward and make sure the colorful PUL waterproof side is facing out. Start rolling from left to right until you have the desired look. You can play with how you fold the point up and how you roll it to create different looks. (The Eco-Friendly Family did this craft as well and folded her pads completely different)

[typography font=”Cantarell” size=”20″ size_format=”px”]Step 2: Attach the Stem Wire[/typography]
Attach the stem wire to the base of the rose bud by using one end and wrapping it around a few times. Use the stem wire to keep the bud closed so make sure it is tight. When you spiral you can pull the bud tighter towards the bottom.
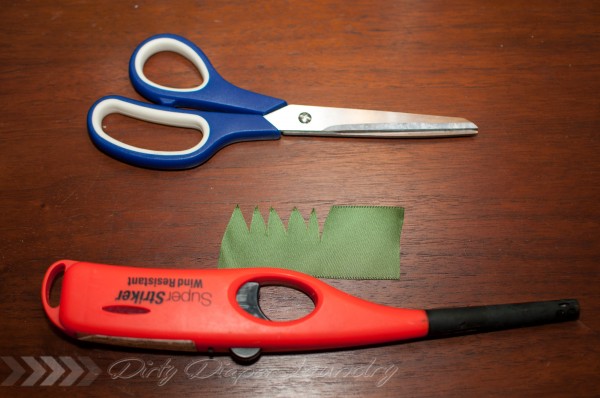
[typography font=”Cantarell” size=”20″ size_format=”px”]Step 3: Make the Bottom Ribbon Cap[/typography]
Using your green wide satin ribbon cut a small section (just a few inches) and snip out triangles to make zig zags. Next, take your lighter and lightly singe the edges. This will keep the ribbon from fraying and also make them curl and look more organic. Wrap this around the stem wire and glue the bottom of the ribbon to itself. Don’t glue anything to the breast pads!
[typography font=”Cantarell” size=”20″ size_format=”px”]Step 4: Close the Ribbon Cap[/typography]
This is the hardest part for me. Trying to start the ribbon that you will wrap around the stem and making it flow nicely from the bottom
“cap” you just glued. For the stem you can either use skinny ribbon of cut the wide ribbon you already have and singing the edge to prevent fraying. The best method was glueing the bottom cap ribbon to itself on the bottom, then glueing the start of the long ribbon to the cap.
Step 5: Wrap the ribbon tightly around the wire. You can intermittently add clue to it doen’t unravel. I tried to get the glue on the stem as well. Keep in mind that this only has to look good for presenting, not last for years, since the gift recipient will pluck the bud from the wire! Make a loop at the end of the wire, add a dot of hot glue, then finish wrapping. You can burn any loose threads off from the stem with the lighter.

Add your beautiful breast pad roses to a bud vase of your choice! They’re a decorative gift that looks great on a baby shower table.

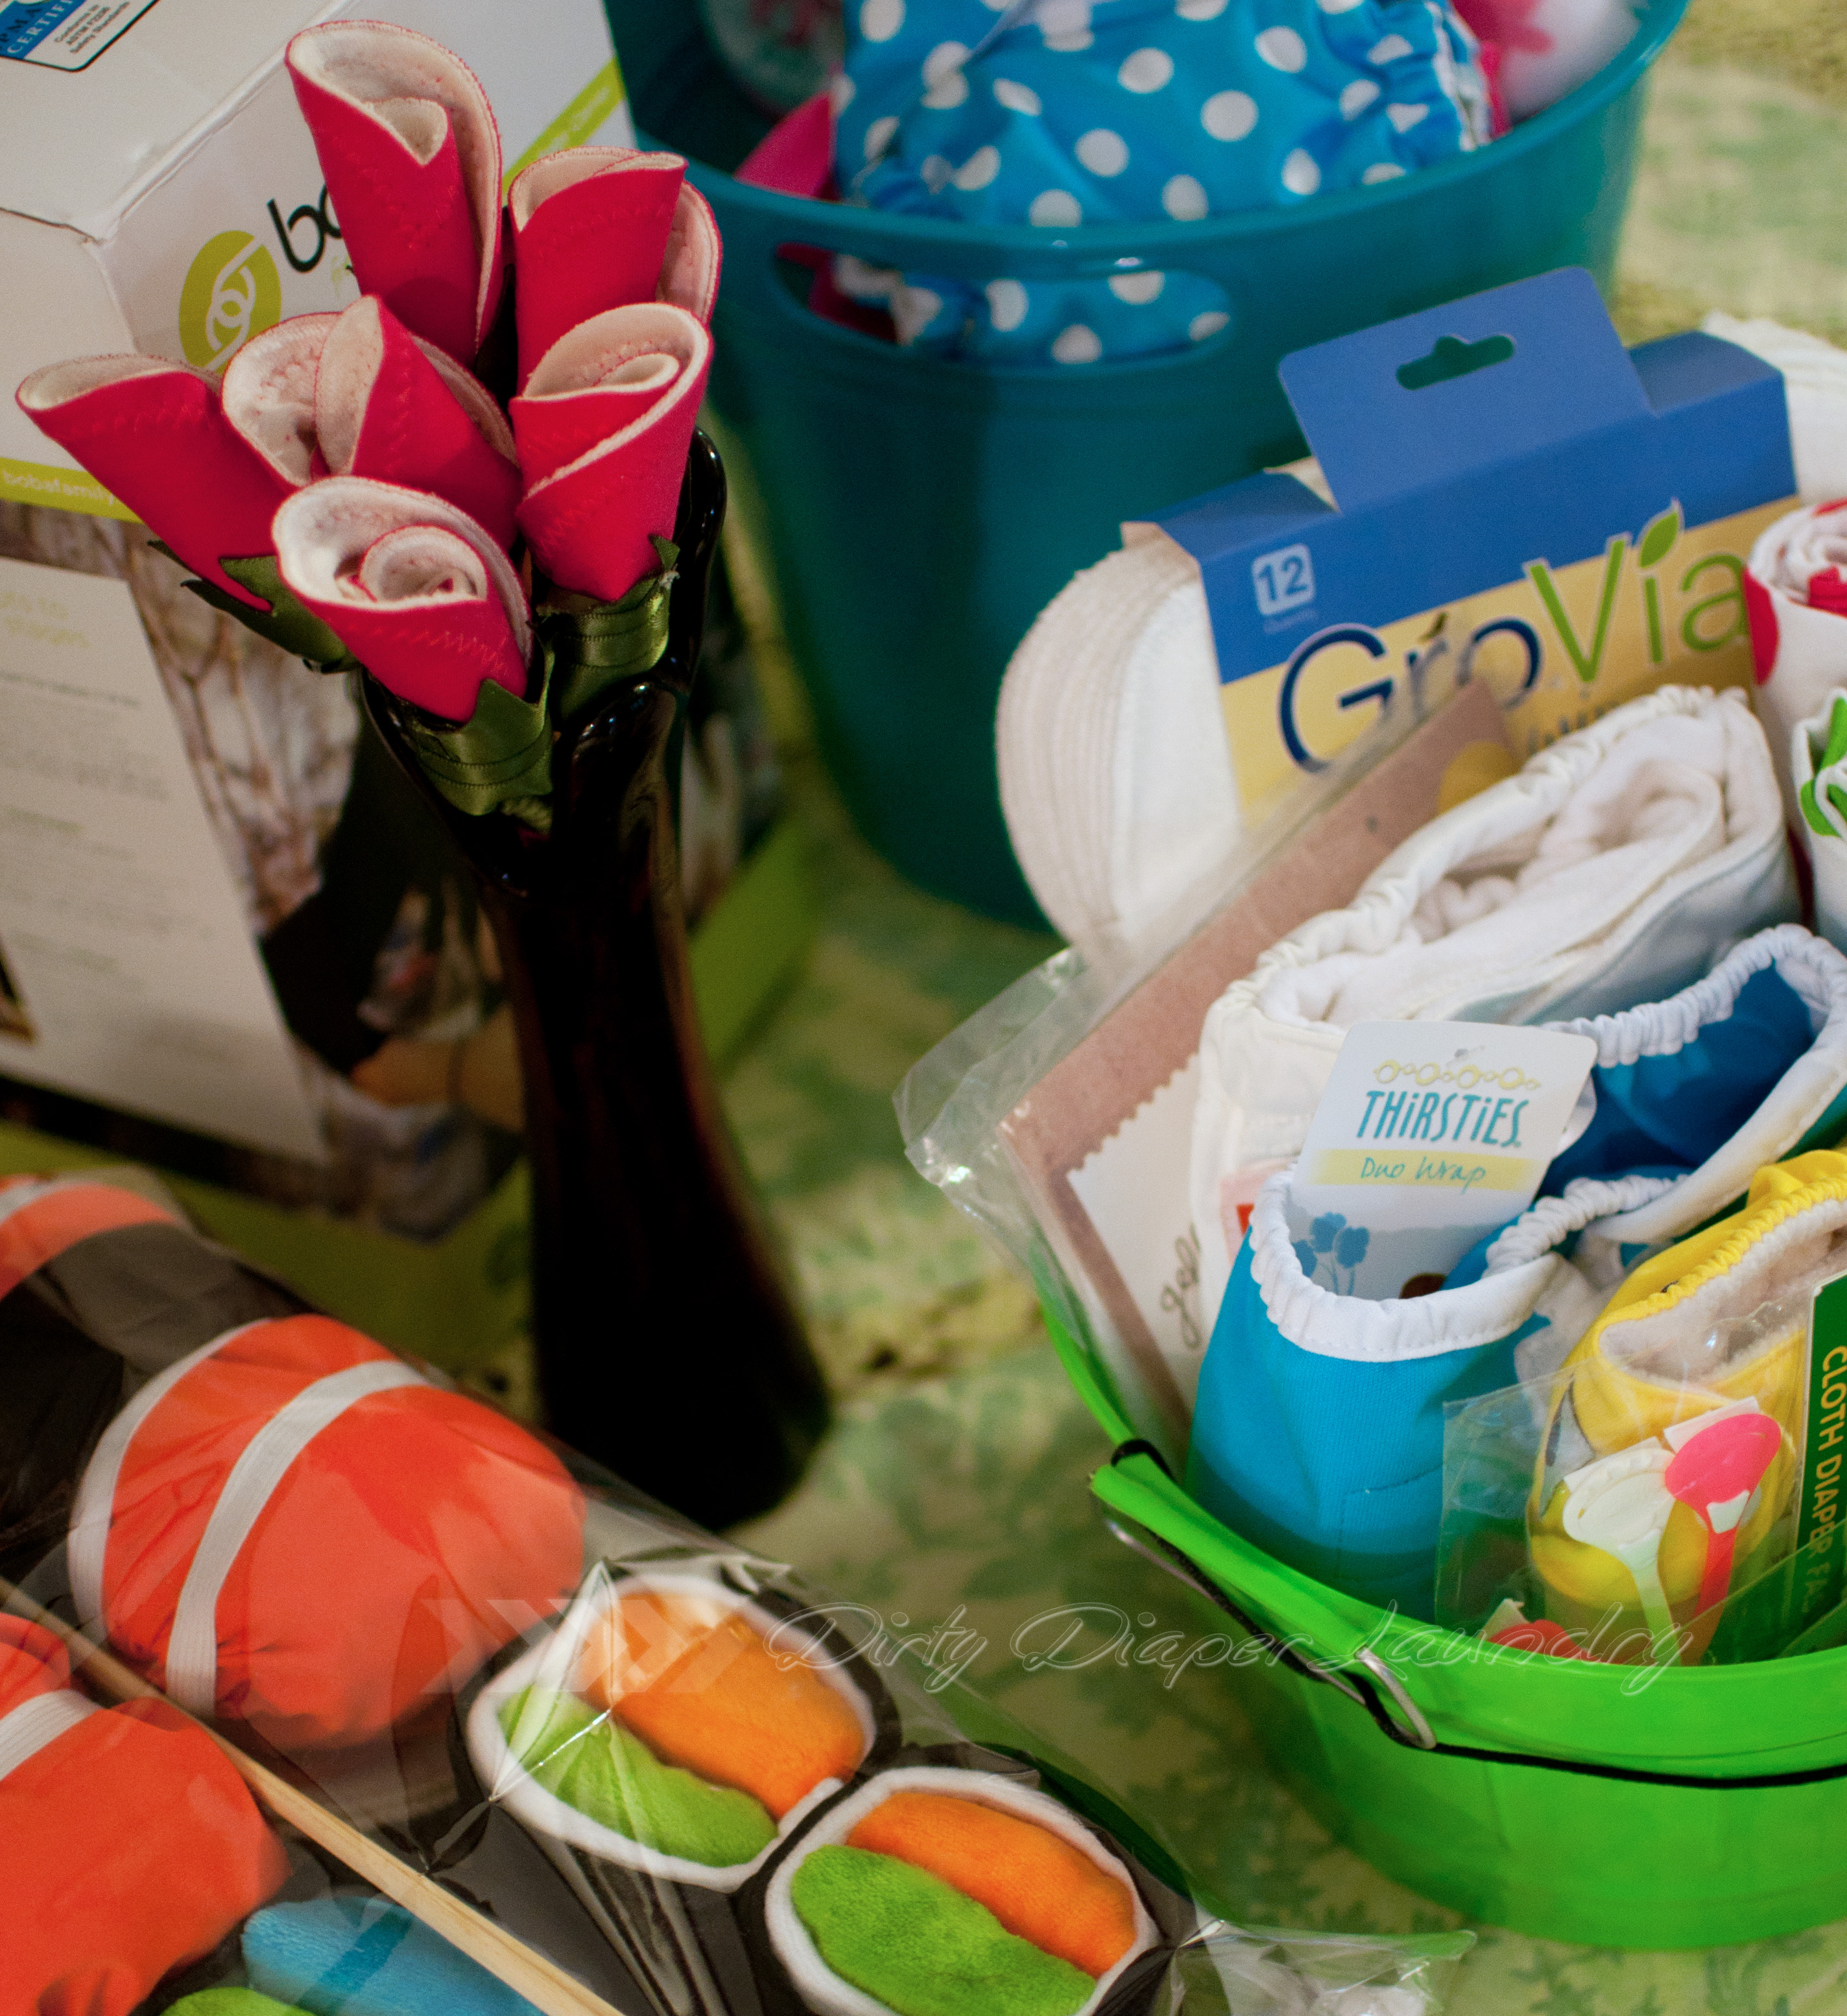
If you love this tutorial make sure you have a look at the cloth diaper sushi baby shower gift post.